Install the Heatsink
1. Cleaning
2. Attach first side of tape to chips
3. Peel off second protective cover and place heatsink

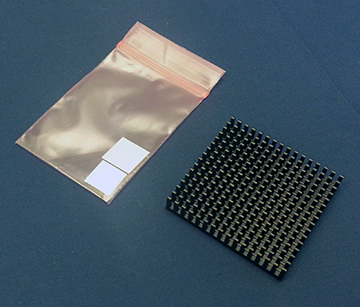
If you purchased your Parallella after July 10, 2014, then the following components will be included in the Parallella box.
This is the heatsink and two pieces of double-sided thermal tape with excellent heat conduction properties to affix the heatsink.
The tape will be placed on the chips first and then the heatsink will be mounted on top. The larger piece of tape is for the Zynq chip (15mm x 15mm) and the smaller piece of tape is for the Adapteva Epiphany chip (13mm x 13mm).
Note: With this heatsink the Parallella board will function in normal conditions without requiring a fan. If the board is in a warm environment, or inside an enclosure, a fan will be required to maintain a reasonable operating temperature
1. Cleaning

Use some alcohol (denatured industrial quality is just fine) and a lint-free cloth to clean the bottom surface of the heatsink and the two chips before attaching the sticky tape.

Work on a clean surface, use gloves, tweezers and a knife to handle the pieces and perform these steps.
2. Attach First Side of Tape to Chips

- Place the Parallella board on a clean surface like an anti-static pad or a clean piece of cardboard or something similar to avoid damaging the board.
- Peel one of the protective covers off one side of the sticky tape with a knife
Be careful not to touch the surface of the sticky tape, as the heat conduction and stickiness would be impaired.
- Turn it over with tweezers and affix it on the chip (position the tape carefully in the center of the chip with no overlap)
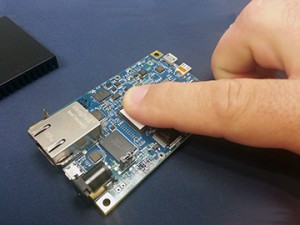
- With the protective cover still in place (do not touch the adhesive surface) use your finger to press firmly on the tape for thirty seconds. Once you place the tape, do not readjust it as this will impair the stickiness!
3. Peel Off Second Protective Cover and Place the Heatsink

- Practice positioning the heatsink in position so that the edges are aligned with the long edges of the board and the inner edges do not touch the connectors on either end (HDMI and Jumper J11)
- Carefully peel off the second protective cover with a knife

- Place the heatsink over the area carefully and press down into position.
- Hold the heatsink in place with light pressure for 30 seconds initially applying a very gentle movement to ensure you expose more of the adhesive to the mounting surfaces.
DO NOT move it enough to break the heatsink away from the tape, just enough to stretch the tape a bit.

Important Notes
1. With this heatsink the Parallella board will function in normal conditions without requiring a fan, depending on your usage. Monitor the temperature using a utility such as xtemp (link below), and keep the chip temp below 70 degrees Celsius. If the board is in a warm environment, or inside an enclosure, a fan will be required to maintain a reasonable operating temperature.
2. Parallella boards from the Kickstarter batch (prior to July 10, 2014) cannot use this heatsink as there are large capacitors and a reset switch which will interfere with the heatsink – do not try and install the heatsink on older boards.
Downloads
Parallella Reference Manual
Parallella Schematic
Epiphany Architecture Reference Manual
Epiphany SDK Reference Manual
Epiphany III 16-core Chip Product
Epiphany IV 64-core Chip Product