So far on this journey the examples we have looked at have been based around simple programs which execute within a sequential manner once the program starts. However real world programs are more complex and it is often the case in embedded systems that the engineer needs to
- Perform a specific task or tasks at a periodic interval
- Time the duration between events occurring these can be external events or internal events
When first introduced to programming a student’s first thoughts will be to consider using a counter or delay loop within your code to achieve these. However this would mean the processor is being utilised executing the count/delay until it reaches the delay required, this approach has two main problems it significantly impacts the performance of the processor and it makes the code very un-portable as the delay will be different on each architecture.
It is for this reason processor designers include specific timers within the hardware of processor, these enable experienced embedded system engineers to configure the timer for the delay required. Once the timer has been configured and started the processor is free to continue processing data until the timer expires and the required action for timer expiration can be undertaken thus increasing performance. Timer expiration is normally identified by a signal called an interrupt, this as its name suggests interrupts the flow of execution to enable the processor to undertake a specific action for that interrupt.
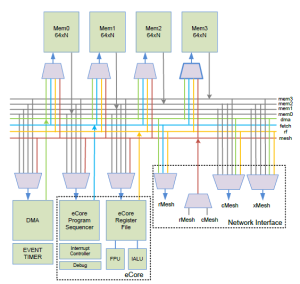
Each Epiphany core contains two 32 bit event timers, each core also has a nested interrupt controller to handle the resulting interrupts.
We can use the event timers for a number of tasks within our application, from acting as a simple counter, a watchdog timer, a event counter , or a more advanced event counter used in profiling execution.
As with many things on the epiphany how we use these is pretty straight forward using the API provided within eLib, which provides the following functions
- e_ctimer_get() – This allows the application to get the current unsigned value of the timer count
- e_ctimer_stop() – This allows the application to stop the defined counter
- e_wait() – This pauses the program while the defined number of clock tick have occurred on the specified counter.
- e_ctimer_set() – This allows us to set the target timer to a defined unsigned value (32 bit value) the counter decrements from this value and when it reaches zero stops counting.
- e_ctimer_start() – This is how we start and configure and start the timer, we can use the configuration type to define the type of event the timer counts.
When we configure the timer we can set it up to count not just clock ticks but also a number of different events which are defined within the e_ctimer_config_t enumerated type. These additional events are very useful in determining and optimising the performance of your system for instance enabling the number of stalls occurring in the Register Access, Execution and External fetch and load to be monitored.
The timers can also be configured to count the number of instructions issued to the Integer ALU and the FPU, most interestingly we can also count Dual instruction events, such that we can ensure our application is optimised for the performance required.
In the next blog I will demonstrate a simple program which uses these event timers in detail to demonstrate these concepts.


